Project Dates 3/9/2021 - 12/15/2021
December 15, 2021
The summer and fall have been very busy in the garden and project world. Had very little time to write. I think it’s about time I catch us up on the flax adventure! After the flush of flowers bloomed midday in late June, the plants started to slowly turn yellow, and the seed heads began to grow. It was estimated to harvest in late July. I measured the flax height, and it was very short. I wasn’t exactly sure what to expect, but should have been somewhere between 36 and 48 inches. I originally thought the flax would grow after flowering. I have since been abused of that idea. Flax is a cold season crop. It doesn’t like heat. Heat forces flowering at which point the plant redirects energy toward seed production, and ceases to grow in height or girth. There was a heat wave just a few weeks after I planted, which was very late, too late for flax in my area for this year. My flax plants only grew to a height of about 16 inches. They were also very thin.

However, undaunted, and still excited about executing the next steps, I proceeded to harvest. The harvesting was just as easy as advertised. I simply grabbed a handful and gently yanked upwards. The flax plant and roots came out of the ground easily. The first step after harvesting was to let it dry for a couple of weeks. I put a clothesline in the garage for that purpose. After hanging to dry the next step is to ripple or thresh the seeds heads. I opted to use a rubber mallet which worked well. Others mentioned stepping on the seed heads, but that didn’t work well for me.
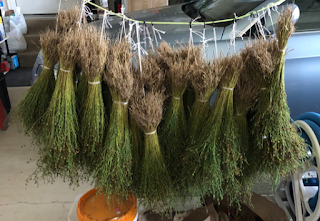

After rippling then the flax needs to be retted. This fiber is then allowed to rot under controlled circumstances. This process breaks down the hard outer skin from the valuable fiber just under the cambium. The flax is either dew retted on the lawn or pond or tub retted in a container large enough to fold the bundled flax under water.
I opted for dew retting, in honor of the naturalist. I found this process to be challenging. It was very difficult to tell when the process was done. I think in large part it was due to the immaturity of the size of the harvested plant. I researched online and reached out to the Hermitage in PA. They were kind enough to sell me an example of their completed retted flax. It was then I realized how immature the plants were in size. The folks at the Hermitage told me that they failed the first two years to successfully harvest and process flax. So, my disappointment at my first try, was weakened by their kind words of encouragement. The two photos show the progress of retting by the color change. Each day, for about three weeks, I turned the stooks by hand so the bundle was evenly retted.


My first year flax is not strong enough to be processed further. I tried some samples and the fiber just disintegrates. There are some longer threads, but even the longest was barely ten inches. Not worth the effort. So, I look forward to reinvigorating this process next year. Since my plot is now opened, I will start at the optimum time which is just a few weeks before the last frost. Flax seeds and plants can tolerate frost even when a few inches high.
Now that the harvest season is over, and to protect the garden and nurture it for next year, I planted oats as a winter cover crop. They have grown nicely and are just beginning to yellow. I am a little worried at how thick they are, and how I will cut them down and plant next years’ flax. But, we shall see… This ends this years adventure in flax planting, harvesting, and processing. In the meantime, I am practicing spinning flax from purchased stricks.
July 5, 2021
On the project front, I’ve been working the third linsey-woolsey (LW03) project. The intent of this project is to practice spinning flax into linen. I had some flax roving from a purchase in WI about fifteen years ago. I thought that practicing on this would be the same as spinning the home grown flax. I have since come to find that the stash flax roving is a mix of short staple length line flax of about six inches and toe flax which is very short fibers left over from the flax processing. This is not at all the same as the intended finished stricks from the flax garden.
I spun an initial bobbin of about two hundred and seventy yards of single spun to about 20 WPI which is the intended grist for the overall project. As I was winding off the bobbin onto a niddy-noddy it broke about five times mostly in the beginning third. That tells me it was a learning curve. But, I was concerned about the overall strength, and after testing just by pulling by hand, decided to size the flax before test weaving a small two-inch-wide warp. After researching online, I found flax mucilage which is basically boiled flax seed. I tested one tablespoon to one cup of flax. I think next time I would use even less. I liked the idea that the flax seed was helping to strengthen the linen, sort of a twist on self-reliance! The end result definitely stiffened the thread!
I warped a very short one-yard length on my floor loom. That simple act of about twenty ends broke one thread. Then after tying on the warp, and adding tension, five more broke. I proceeded to weave a header to spread the warp, but another broke. That was it. Though leaving that under tension broke no further warp threads, I realized that combining the fact that the flax roving was not the end product I would be spinning, plus the effort to size, plus the amount of broken threads, this was a very faulty test, so I abandoned the idea. I settled on the fact that this flax roving will simply become weft!
This weft will become part of a version of the LW03 project which will target kitchen towels and napkins. I ordered flax stricks to practice on while waiting for my flax garden to mature, and the processing to be complete. In the meantime, I am in the process of spinning the remaining stash flax roving into weft! The intent of this project to learn to spin flax is still intact, plus I will gain experience spinning flax into linen weft, weaving with linen. Though not a true linsey-woolsey project, this stepping stone will allow me to practice and hone flax spinning and weaving skills. And yes, I intend to dye some of the flax to practice and sample that art as well, using natural marigolds which are currently being harvested, and onion skins which have been slowly building from the kitchen scrap pile!
June 6, 2021

Ok, I am getting nervous about the flax garden. The flax is growing, it’s about a foot high in some spots, but overall it seems to be about 6 to 8 inches. I read multiple references online that linum usitatissimum does not require much water as it prefers dry conditions. Yellowing is a symptom of disease. Mine is not yellowing, but I am concerned about the lack of height. Target height is twenty-eight (28) inches. Target bloom date is June 25, so we only have another three weeks to grow at least twice its height. I am anxiously waiting on the results.
May 28, 2021
Finished weaving the LW02 project. I just recently added the Leclerc weighted temple which I am liking. It’s easier than the traditional temples. After finishing weaving, I wet finished by gently hand-washing, and using the dryer. I checked the fulling in the dryer every 5 minutes. Then I used a presser and steamed press using wool setting eight times. I was totally amazed at how wet-finishing closed up the cloth, made it incredibly softer, and gave it a nice soft but gently firm hand. The transformation from wet-finishing is truly an amazing process!
May 23, 2021
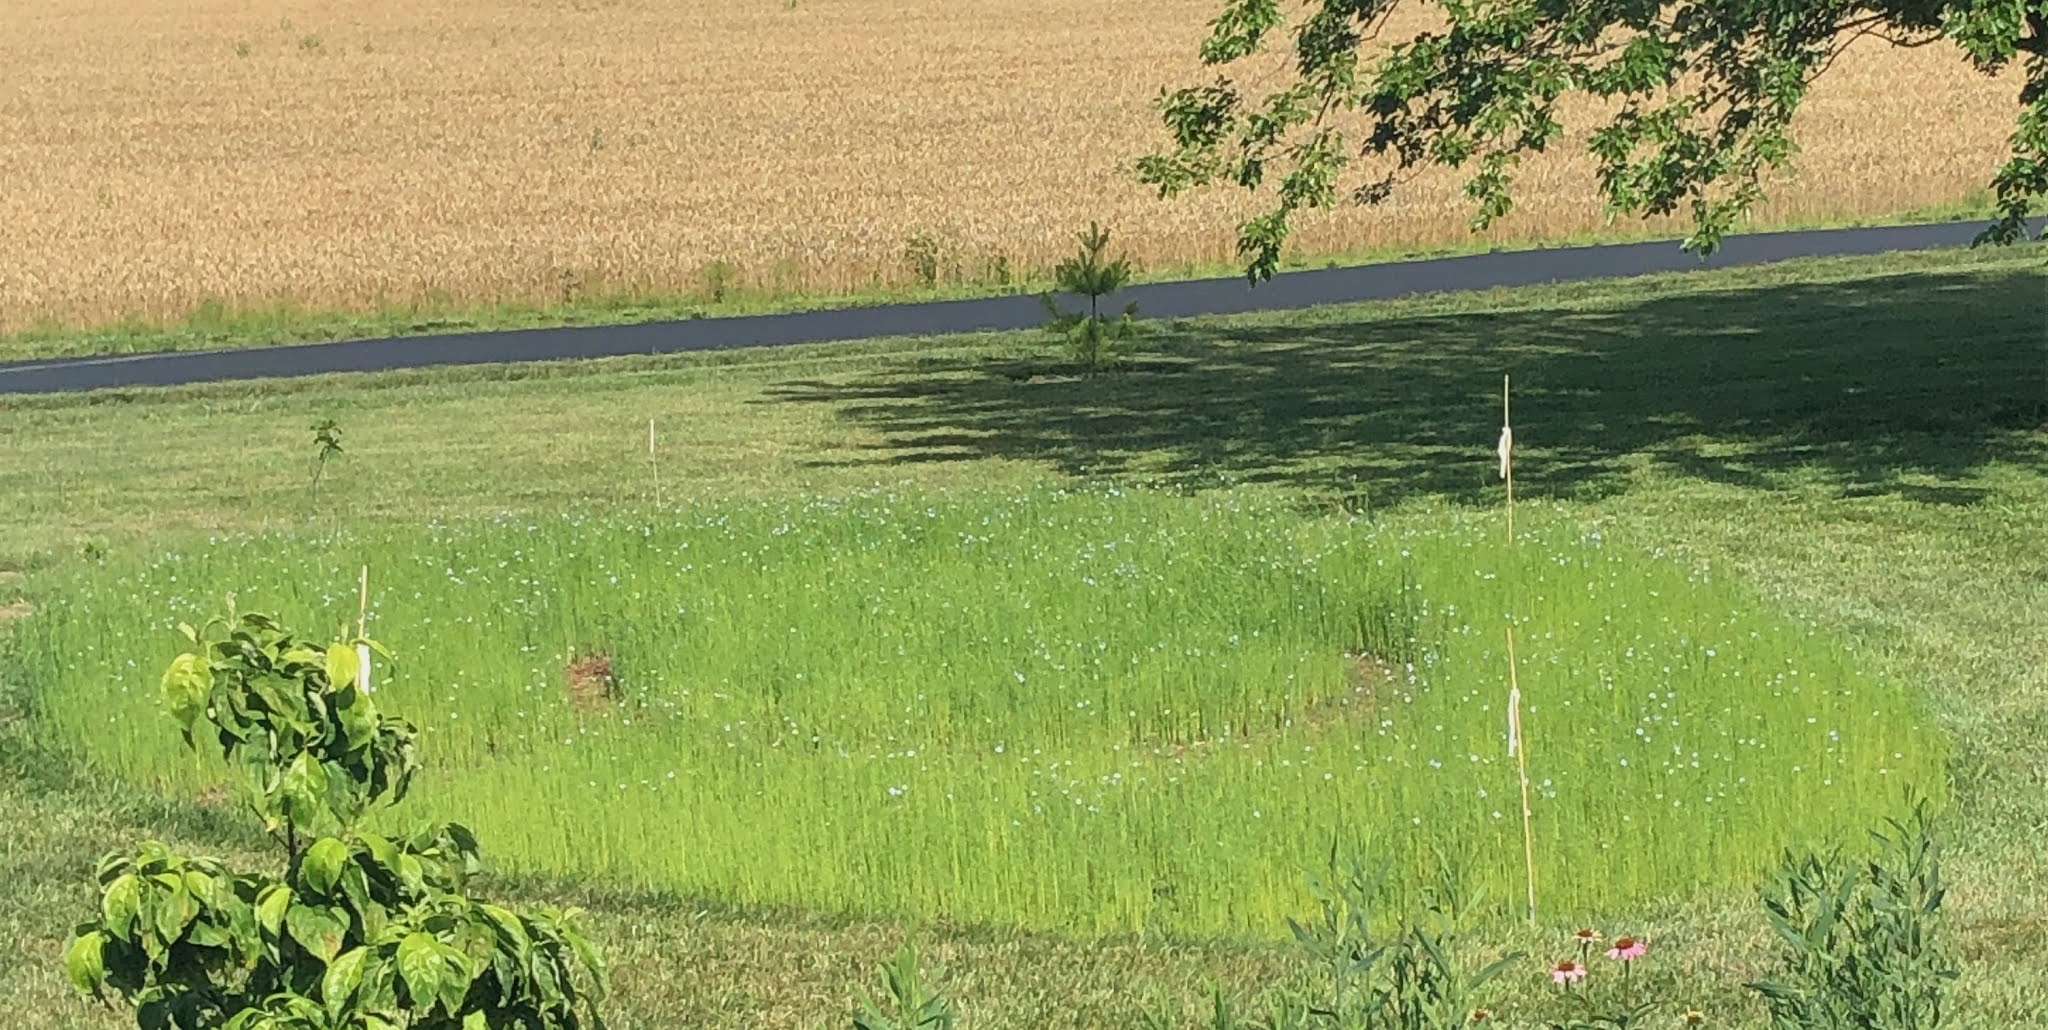
Well, though it varies in height from about 2” to 5”, it definitely looks like flax! There are some barren spots, but that appears to follow the spread pattern from throwing the seeds by hand. I did notice a bird or two but they appear to pick and leave immediately. The flax doesn’t appear to be to their liking. This morning I also saw a rabbit, two in fact playing. One of them entered the flax and nibbled once or twice then left back to playing. Not sure what to make of that, but they didn’t appear to be too hasty to feed there. I also noticed a couple of spots that are yellowing. They are a foot or two in size. I know flax is a cool season crop, and the weather has jumped into the eighties this week. Hope that doesn’t continue, or harm the flax. For having sprouted so quickly, and then only being coming up to half a foot in a month, I am a little worried that I may have waited too long to plant. We had no choice, because it took a while to open the area. It’s only been 30 days. Another 30 days till flowering, we’ll see!
April 30, 2021
Hmmmm….the area where the flax was planted has started to sprout. Linum Usitatissimum is supposed to take a week to ten days to germinate. It’s only been four. So, could it be that over anxious to appear? What makes this suspiciously possible is that the area that is germinating is the ring of flax. The area where a path was left is not germinating. So, could it be? We’ll see!
April 26, 2021

April 19, 2021

ringe of linen of about one and one-half inches.
The wet finish included the Laura Fry fingernail test (Fry, 2021)! I washed the fabric in lukewarm water with Orvus paste and gently agitated for a few minutes. Rinsed in lukewarm water and then wrapped in a towel to squeeze out the water. I then put it in the dryer just on air and checked every few minutes. At the beginning, the first nail test before putting into the dryer was like my very first ice skating experience. I slipped and fell across that ice almost upon contact, and so did my fingernail. Merino wool, me, and linen, the ice, behaved similarly! It took about 20 minutes and I was amazed how much grab the felling process implemented. The silkiness of the merino was retained. All in all though I had my doubts at the thickness of the cloth, it turned out to be a great scarf!

On to LW02, which will use the same 20/2 belgian linen warp. I had measured the remaining stash amount to two full scarf lengths in anticipation of this second test of linsey-woolsey. This will be a much simpler balanced tabby weave. The weft is a 20/2 romney wool (50%) and llama (50%). I have two colors, a reddish brown and a light sienna. I am leaning toward weaving in light sienna with an occasionally single thread of reddish brown.
April 9, 2021
Interestingly, it’s been exactly one month since writing which is just happenstance! The initial linsey-woolsey project is coming along. It is scarf sized. I put on a warp width of about nine inches and used up that remaining stash of the 20/2 indigo blue belgian linen. The weave is a warp-faced double-weave. The fabric is much thicker and denser than anticipated but is silky soft. It is about halfway of the finished length of sixty-four inches. The wool weft is slippery on the linen warp. The linen warp peaks through and provides a really nice basket weave pattern. Literally, it reminds me of a woven basket with the vertical reeds straight and the horizontal reed curling back and forth through the vertical warp. Because the merino grist varies, it provides a nice subtle textural pattern overall.
March 9, 2021
The idea for this adventure came brewing from several sources swirling around my brain. Some months ago, I stumbled upon the movement known as Fibershed and immediately ordered their book. The movement is about revolutionizing the textile industry as a way to support natural ecological systems to disrupt the climate change contributors from the fashion industry (Burgess, 2019). It sang to me. Clothing, textiles, fiber, love of planet, all speak to my soul.
Continuing that journey through networking with the movement and a local chapter in my geographical region, I joined the Chesapeake Fibershed. The idea of the regions is that clothing should be grown regeneratively and returned to the soil all within the same ecological and geographical region to disrupt costly energy patterns in the traditional clothing making industry process. Interestingly, the core members of that group seem to have affinity with either wool or bast fibers.
Recently, I attended a Fibershed webinar that discussed various aspects of the flax to linen process. The fiber and the processing were fascinating. I have worked with linen in my fiber art. But, I have not yet spun flax, which is in the queue on the fiber to-do list! Linsey-woolsey was mentioned in the webinar, a cloth made traditionally from flax warp and wool weft as being produced in our Fibershed area in colonial times. Linsey-woolsey has traditionally consisted of linen warp and wool weft. It primarily was used to conserve wool. During colonial times, it was an important commodity in all of the states (Wikipedia contributors, 2020).
The colonial times cloth is always described as coarse. It was used in the late 1700’s by those less fortunate with challenge getting wool fiber to make wool fiber last longer by combining it with flax, which was more widely available, and a staple crop in all of the colonies. The origin of the word linsey-woolsey dates to the middle 1400’s in Europe and refers to a coarse fabric.
There are historical references that the wool that was used in the linsey-woolsey came from whatever leftover wool fibers were available. These were generally of very poor quality. It came from what the sheep left behind in bushes, and the poor areas of the fleece after shearing. Combined with readily and easily available flax fiber, it’s no wonder that the quality of the fabric was coarse given the origin of the wool fiber. So, what does linsey-woolsey, made from better quality wool feel like?
Serendipitously, as I was researching linsey-woolsey, I ran across an artist, who is also familiar with the Fibershed movement, and works with hand crafting linsey-woolsey cloth as background for her art. Small world! She also decided to plant some flax to spin linen. Her opinion of the cloth used both as a shirt and as a blanket was that it was extremely comfortable in heat, and the drape was very soft. Linnet was founded in 2000 and sells cloth that is 50% wool / 50% linen in the original linen warp and wool weft patterning. It is also made into wearable clothing (Linen wool cloth, 2021).
The historical references of the linsey woolsey description of being coarse seems incongruous the fabric available today. However, the etymology of linsey-woolsey has come to describe coarse cloth due to it’s historical origins. Modern processing however have made the combination of flax and wool not only soft but next to the skin wearable.
An idea started to take form. A project that is comprehensive, multi-stepped, and raw material to product oriented is very intriguing. I really like the idea in projects to take them from design to product. I am designing a project that starts with planting flax seed, merges with local Fibershed wool, and completes through processing the flax, spinning both types of fibers, and creates cloth for a garment or household item. The area of flax that is needed for enough fiber to make something wearable is about 150 to 225 square feet of planted flax. Well, that area of ten to fifteen feet by fifteen feet seems doable! On it went to the master backyard gardening plan. Online I went, and the seeds have already arrived. One pound, which is the amount estimated to be needed for that size of crop area. Now just need the weather to get a little warmer, and to stake out the flax area for sod removal!
Sampling for the cloth has begun. Not the real eventual cloth. LW01 is the first project in this journey from full seed to clothing. LW01 starts with stash of linen and wool to begin to get a feel for the eventual drape and weave structure that may be targeted. I have some leftover 20/2 linen from a knitted lace tablecloth that was done early in this century. Also, wool abounds everywhere in my environ, and I have some leftover variegated gold and brown merino single-ply that is screaming to be part of the linsey-woolsey gang. The original purpose is nicely ensconced as the front panel of a completed sweater named Atomic Blue. I worked up a quick little two-inch square weave to test out that combo for sett and esthetics. I realize it will be far from the truth of the eventual project, but it will provide the seed (pun intended!) to prod further thought and momentum for this longer-term project!
Enjoy!
References
Wikipedia contributors. (2020, August 23). Linsey-woolsey. In Wikipedia, The Free Encyclopedia. Retrieved 19:44, March 1, 2021, from https://en.wikipedia.org/w/index.php?title=Linsey-woolsey&oldid=974496044
Burgess, R., White, C. (2019). Fibershed: growing a movement of farmers, fashion activists, and makers for a new textile economy. Chelsea Green Publishing. White River Junction, VT
Dictionary.com : linsey-woolsey. (2021). In Dictionary.com. Retrieved March 1, 2021, from https://www.dictionary.com/browse/linsey-woolsey
Linen wool cloth. (2021). Retrieved March 6, 2021 from https://www.lin-net.com/English/Linnet_origin_colec6.html#Linenwool
Fry, L. (2021). Wet-finishing for weavers with Laura Fry. Long Thread Media. Retrieved April 19, 2021 from https://learn.longthreadmedia.com/courses/wet-finishing-for-weavers-with-laura-fry
Schmidling, J. (2021) Fiber Crafts. Retrieved April 19, 2021 from https://schmidling.com/fiber.htm
Merriam-Webster. (n.d.) Linsey-woolsey. In Merriam-Webster.com dictionary. Retrieved May 23, 2021, from https://www.merriam-webster.com/dictionary/linsey-woolsey.


